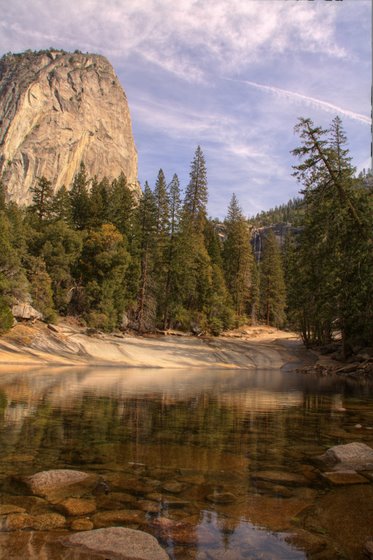
HDR is all the rage these days, so I thought I’d give it a try. HDR stands for “High Dynamic Range.” I know this isn’t directly related to food photography, but if you like taking pictures of food, chances are you like taking pictures of other things, too!

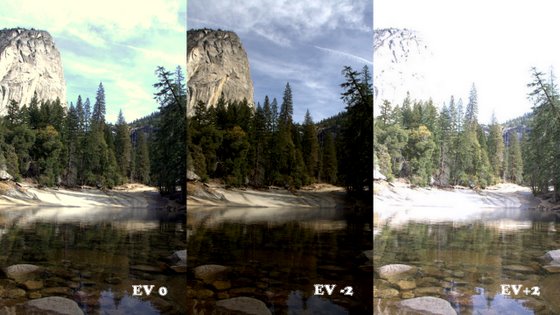
Have you ever tried capturing a scene where the foreground is in a shadow and the background is a bright sky? Either you meter the shadowy part correctly and the sky is washed out whiteness, or you meter the sky correctly and the foreground is way too dark. For some situations, cameras are not capable of enough dynamic range (basically the range between dark and light) to capture the extreme brights and extreme darks in the same photograph. HDR basically attempts to combine multiple images together (usually using 3 or 5 images) ranging from over-exposed to under-exposed. So how do you do it?
First you need to take some pictures. Most digital SLR cameras have a feature called “bracketing.” My Canon XSi allows three bracketed pictures. Some higher end cameras can do five. You don’t have to use bracketing, it just makes things easier. If you have an older computer, like me, try using three instead of five pictures to start, because it will be easier to process. For three pictures, set your camera to take the bracketed pictures at 2EV. This means it will take three pictures. On my Rebel XSi it takes the normal exposure first, then the under-exposed (-2EV) picture, then the over-exposed (+2EV) picture.

If you set the camera to continuous shooting, you can hold the shutter release and snap three pictures in a row. That means you might be able to hand-hold a shot if there is enough light. (Note: the over-exposed picture might have too slow of a shutter speed to hand-hold). If your camera doesn’t have a bracketing feature, just take your own three pictures changing the EV for each one.

Drago
Using a tripod will yield the best results, since the three pictures will be exactly aligned and you don’t have to worry about camera shake at slow shutter speeds. I set my camera to the 2-second timer and it takes all three pictures in a row.
Now that you have three pictures, its time to process them. Photomatix is the most popular software for HDR pictures, but it costs money. We live in China and we don’t make much money, so FREE software is always a blessing! Qtpfsgui is free open source HDR software that works pretty well, especially if you are just playing around to see if you like HDR pictures.
Download Qtpfsgui (I know the name sounds strange, but it’s legit), install it and run it. Click load images and pick your three images. I used raw (CR2) files straight from my camera and it worked fine. Once the files load, you can set the exposure values of each manually. (I found that this didn’t matter, because mine worked even if the values were stated incorrectly). Click auto align if you didn’t use a tripod. Then just click finish on the next screen.

Mantiuk
Now you need to “Tone Map” you image. Here is where the fun starts. You have to choose if you like the surreal look or the more realistic look. I’m not personally into the super surreal look, but its fun to try. Use “Reinhard ’02” or “Drago” for a more realistic look. Use “Mantiuk” for a more surreal look. Just try playing around with different settings. Change the result size to something small, but visible, while you’re trying different settings, then set the full size image when you’re ready to save. Don’t forget the “Pre-gamma” at the bottom and the “adjust levels” button at the top before you save the final.
I found that for a nice blend between surreal and real, save a “Reinhard” or “Drago” and a “Mantiuk” and layer them in “Photoshop” or “Gimp” (a free Photoshop-like software). Then change the opacity of the more surreal one until you like the look. For the final photo at the top I used “Drago” as the background layer and “Mantiuk” as the top layer at about 50% opacity in Gimp.


Nice tutorial.. I think HDR is great, Especially the dreamy aspect.
Mike
Excellent! I’m very envious of those photographs, I wish I could do as well.Those pictures took a lot of aptitude to make, well done. I’ve bookmarked this site.
Qtpfsgui is now called Luminance HDR and the Windows version is no longer free – he wants 15 euros for it now.
Looks like you can still download the older version 1.9.3 for free, though.
I have never got the image alignment tool to work, unfortunately – it crashes the program – so a tripod is a necessity!