


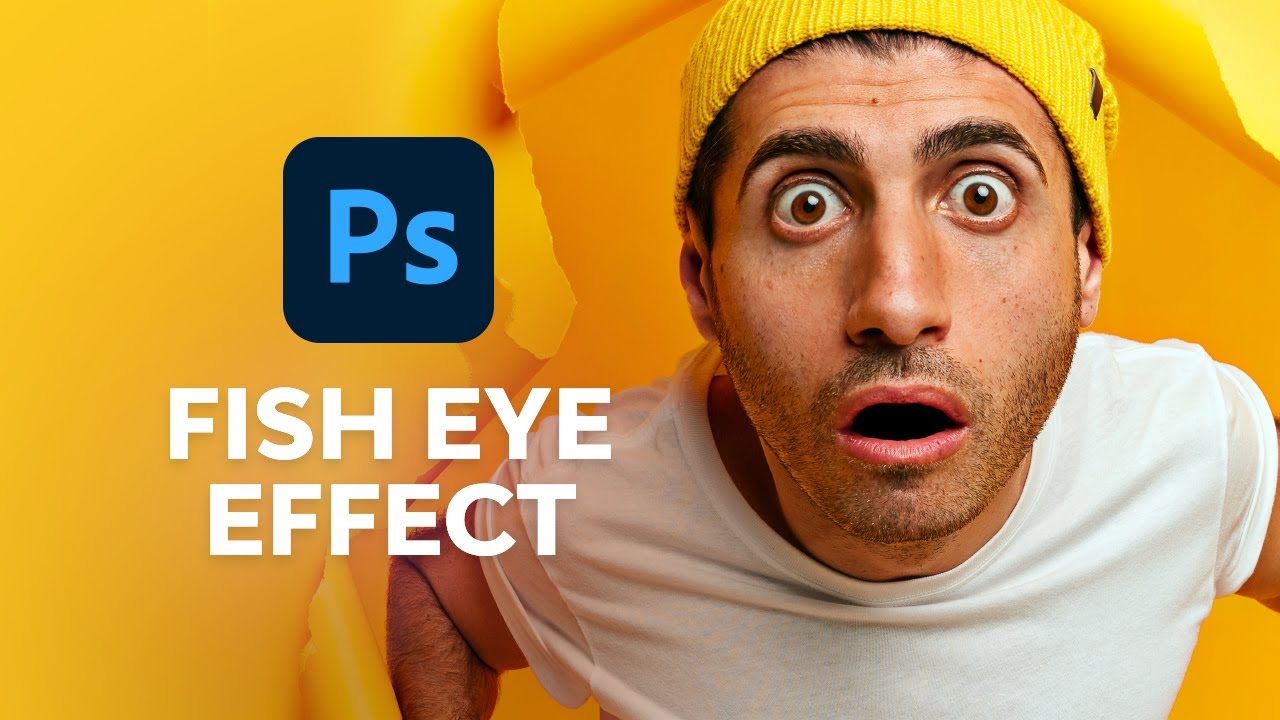
Today, we'll be creating a fisheye effect in Photoshop using only two filters. This fisheye filter works on both landscapes and portraits!
Looking for even more Photoshop fisheye effects? Try one of the hundreds of premium actions, add-ons, and graphics over on Envato Elements.


If you fancy watching video tutorials, you need to visit the Envato Tuts+ YouTube channel to find the best videos and courses! You can follow this tutorial by watching this new video to learn how to add a fisheye effect to a photo in Photoshop:
What You'll Learn in This Fisheye Effect Photoshop Tutorial
- How to make a fisheye lens in Photoshop
- How to make a fisheye effect in Photoshop
- How to edit a photo to a fisheye effect
What You'll Need
To complete this project, you will need the following resources:
Find more resources on Envato Elements!
How to Create a Fisheye Effect in Photoshop
Step 1
First for our fisheye in Photoshop effect, let's Duplicate our subject using Control/Command-J.
You can make this fisheye lens effect non-destructive by using Smart Objects, but I'm just going to create a backup copy to keep things simple.


Step 2
Now, we're going to go to Filter > Lens Correction. While it says "correction," this is what we're going to use to distort our image.
We drag either towards or away from the center of the photo to create a fish-eye-like effect, either pulling our subject in towards us or out away from us.
In this case, I want his face to appear distorted and closer to the foreground. So I'm going to pull away from the center to pull him closer to me.


Step 3
Now, I'm going to create another Duplicate, just to be safe. It's optional.
Then, we're going to go to Filter > Liquify, and we want the Bloat tool.
We want to set our Rate to around 5. And we want our brush Size to start very large. It depends on your image's resolution, but my Size started at 4300.
Now, we want to place our brush over the subject's face and use the Bloat tool to enlarge it and add a fisheye effect to the photo.
You can either hold down on the brush in one area for a very slow and small amount of distortion. Or you can make small circular motions to increase the rate at which it liquefies.
When learning how to make a photo look fisheye, if you want a very fishy fish-eyed effect, slowly lower your brush Size using [ and ] while you bloat the face. This will make it so the distortion becomes more concentrated on the face, in between the eyes.
This will usually end up pushing the eyes apart and enlarging the nose. Making it a quick and easy caricature effect as well.


Step 4
We could stop here, but I like to grab the Pinch tool and Pinch the subject's body to make it appear further from the camera (you, the viewer).
You want to be a bit subtler here. A little goes a long way.


Step 5
I like to add a fast Filter > Sharpen > Smart Sharpen to hide any stretched-out pixels. Also add a small amount of Filter > Noise > Add Noise. Add around 2 to 3%.
Step 6
And finally, add some contrast and a bit more sharpening using a High Pass Layer.
For that, we Duplicate the subject, set the layer to Overlay, go to Filter > Other > Highpass, and set the Radius to around 40%.
Then we can adjust the layer Opacity, bringing it down to 30%. These last few steps were, of course, optional.


That's It!
That's how to add a fisheye effect to a photo! Remember, this is also how to create a fisheye effect on landscape photos—just skip the liquefying step.
This is by far my favorite way to create a fisheye effect in Photoshop thanks to how easy it is, but you still get to customize how strong you want the fisheye lens effect to be.
Create Ink Effects Even Faster With Envato Elements!
But if you're looking for even more fun effects, like this Photoshop fisheye effect, then take a look at Envato Elements, where you'll find thousands of add-ons, graphics, and actions.
Fisheye Lens Photo Effect
Wondering how to create a fisheye effect even faster? This fisheye action in Photoshop is perfect!
Analog Camera Actions for Adobe Photoshop


After learning how to make a fisheye lens in Photoshop, you can then follow up with some analog-inspired image effects. These work especially well on landscapes.
Polaroid Photo Frame Effect


If you want a completely different vibe, you can try this Polaroid photo frame action! When learning how to fisheye in Photoshop, you can just stop after you add a fisheye effect to the photo—I think it's great to pair with other effects.
Instant Hipster Lightroom Presets


This is another set of presets that would pair amazingly when learning how to make a photo look fisheye. They are easy to install and even easier to use!
Prism Glass Photo Effect


A fisheye effect in Photoshop is a classic way to distort an image, so why not pair it with some classic lens flares? These are subtle but gorgeous!


