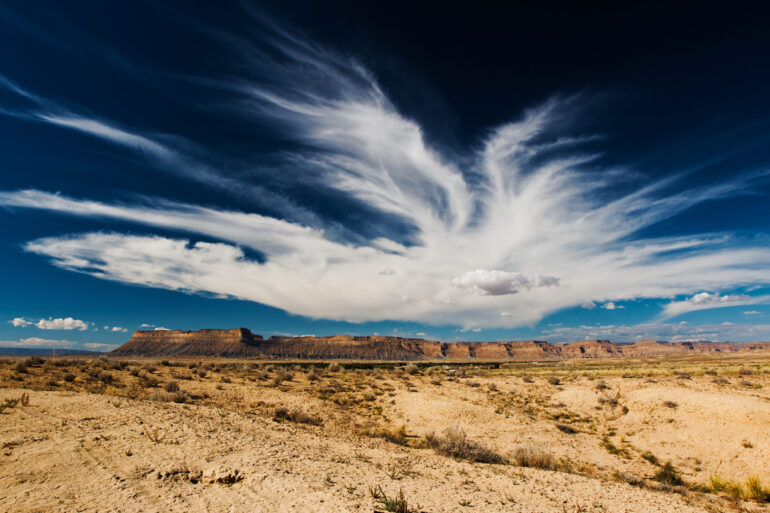
 One of the most commonly asked questions by digital photographers is how they can keep the sky from looking so overexposed and washed out in their images. The photo to the right is a perfect example — a very pretty landscape, but a painfully overexposed sky. Most of the time the sky is going to be the brightest part of your scene on sunny days. When we look at a scene with our eyes we’re able to see the deep blue sky above the landscape, as well as the detail of the landscape itself. Unfortunately, the digital sensors in our cameras don’t have the dynamic range that our eyes do, meaning they can’t capture the full range of tones that we can see, and if the difference in brightness of the sky and the land are simply too far apart, it’s very difficult for both elements of the image to be captured properly.
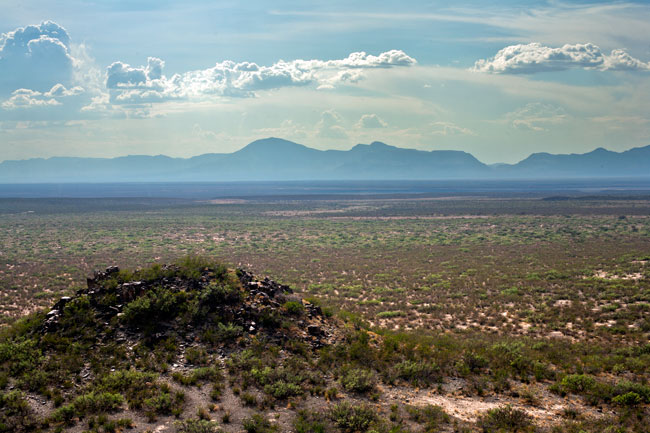
To return to the example photo seen above, we’re going to try to see if we can save this shot. Fortunately, it was shot in RAW — if it were shot in JPEG, there would be very little point in even trying to save the sky since all of the tonal information would be gone. While many photographers who find themselves with overexposed images often try to burn in the sky, that usually results in less than stellar results when dealing with a sky this overexposed. To obtain the best results, we’re going to reprocess the same RAW file, but this time we’ll focus only on the sky, reducing the exposure and brightness and recovering as much detail as possible.
Using an image editing program like Adobe Photoshop, we can then stack the images and blend together our two images using layer masks, taking what we like from each. The result is…not bad, but definitely not perfect. We were able to recover a lot of detail in the sky, but it still doesn’t look the same as it would in real life. There’s still lots of atmospheric haze and to anyone who knows photography, it’s obvious that we originally overexposed our sky. Being able to post process and edit an image is never a substitute for getting it right in camera.
Whenever possible, it’s always better to get things done right to begin with. The following methods are a few ways to ensure your photos are properly exposed with nice blue skies! Whichever solution you use, your results will be improved by shooting in RAW and using your camera’s manual settings, giving you full control over the exposure.
Shoot RAW, not JPEG
Yes, your photos will take up a little bit more room on your memory card and hard drive once you upload them, but the greater freedom you have to “develop” the images as you choose is worth the extra space. The reason RAW files are larger is because they contain more image information — useful data that you can use to recover some degree of detail in areas that appear over and underexposed. Shooting in RAW isn’t a way to fix completely overexposed photos, but if your sky is only slightly overexposed, there’s a good chance that you can recover more detail than you might expect.
Use your Camera’s Histogram
Your camera’s histogram feature conveniently graphs your photos tonal range from dark black shadows on the left to bright white highlights on the right — the higher the graph goes in one area, the more pixels of this particular tone can be found in your image. If you see a big spike on the graph pressed up on the right side of the histogram, you’ll know that you’ve got a portion of your image that’s overexposed; if you’re photographing outside on a bright, sunny day this usually means that you’ve got blown highlights in the sky. Because it’s very difficult to even see your camera’s LCD screen in bright sunlight, you’ll find the histogram to be exceptionally useful for evaluating exposure — it’s much more reliable than trying to judge exposure based upon how the image looks on the screen. You’ll find the histogram feature on virtually every digital camera including compact point and shoots and entry-level DSLR cameras.
Expose for the Sky
Ideally, we want to photograph a scene where there is an even distribution of light and dark areas without any detail lost to overly dark shadows or blown highlights. As you probably know, there are three exposure variables — shutter speed, aperture, and ISO. By increasing the shutter speed, lowering the ISO, or decreasing the aperture (using a higher f-stop) we can darken the scene by letting in less light or by making the sensor less sensitive to light.
For situations where the sky is the brightest part of a picture, this means our sky will be darker and presumably more blue — exactly what we want. The downside to this approach is that it’s not just the sky which will be darker, it’s the entire scene. Sometimes we can find the ideal exposure which gives us both a properly exposed sky and a properly exposed subject or landscape, but there are certain times and angles which make this impossible to do by adjusting the exposure variables alone. For times when we want to take a picture of a specific angle, but the lighting makes it impossible to properly expose both the sky and the ground we always want to shoot in RAW and expose for the sky. An image where the landscape is slightly underexposed is almost always preferable to an image where the sky is overexposed. Using photo processing software like Adobe Lightroom or Adobe Photoshop, we can recover the detail from the underexposed areas much easier than we can with an overexposed area. Think of this exposure data like a cup of water: It’s easier to pour some out to get to the right amount than to conjure it up if we don’t have enough. That doesn’t mean that you can always recover some details from areas of extreme shadow, so it’s important to find the right exposure balance so that your sky is dark, but the shadow details are still recoverable.
Shoot Away from the Sun
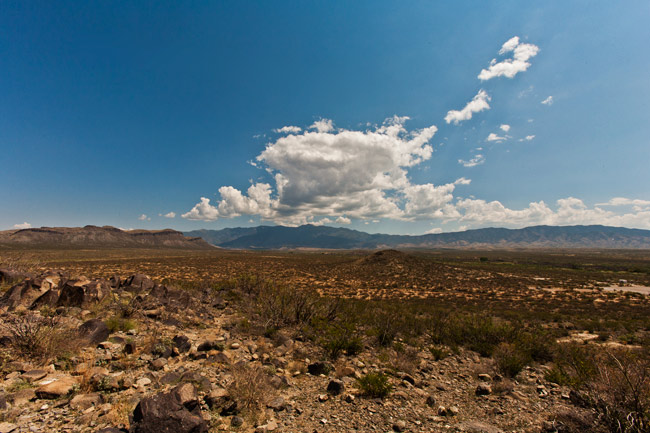
The brightness of the sky depends not only on the time of day, but also on the direction we’re shooting in. Where the sun is in the sky will have a huge effect on your photo; you’re usually going to get a much darker, more vivid sky when the sun is behind you than in front of you due to the angle of the light. If you can, shoot away from the sun, with it at your back — it will usually make it much easier to get a properly exposed foreground, background, and sky in one single exposure. Even in the early morning and late afternoon, when the sun doesn’t seem as bright to us, it’s still capable of creating overexposed skies if you shoot directly into it. Of course, sometimes this is just the effect you want, but always be mindful of where the sun is located.
Shoot at a Different Time of Day
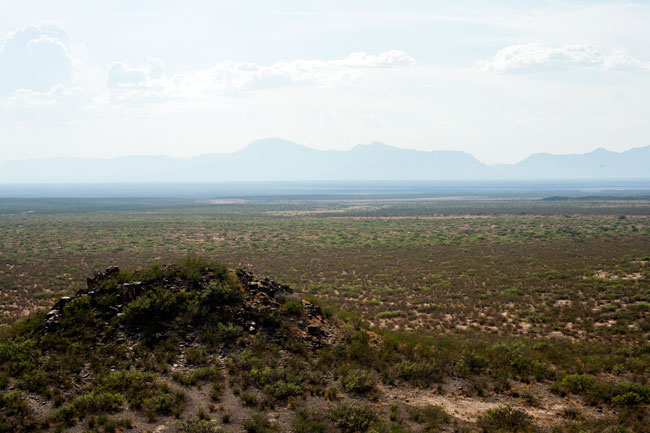
If the mountains you want to photograph are to the east but the sun is too, you can improve your scene by coming back earlier in the day, when the sun is behind you in the west. Along with overexposed skies, atmospheric haze in the distance is another element that we typically want to minimize. Caused by minute particles of dust, water vapor, or pollution, haze can make the background of our photos look dull and washed out. In the first example, you’ll notice it also lends a bluish tint to the distant mountains. The angle of the sunlight striking these particles effects how they appear in our photos; coming back earlier or later in the day or after a rainstorm can help keep the atmospheric haze in your photos to a minimum.
Shoot and Blend Multiple Bracketed Exposures
By blending multiple bracketed exposures of the same scene, we can create an ideal image with proper exposure in all its areas, better replicating the wider dynamic range our own eyes can see. While the method is similar to what we did to fix our first example photo when we had only one shot to work with, shooting two or more photographs with varying exposure levels allows us to create a much better and more accurate image with proper exposure in both the foreground and the background.
TIP: If you’re going to shoot multiple exposures of the same scene, it’s a good idea to use a tripod to ensure that your camera captures the identical shot for all of your bracketed exposures, making it much easier to merge them together later.
Use Flash Photography
When we want to photograph a relatively small subject that’s within a few meters of our camera, we can expose for a darker sky and use a fill flash to illuminate our subject. This isn’t going to be of any use for regular landscape photography of distant terrain, but if you’ve got a flower or person you’re focusing on with sky behind them, this technique will be very useful and can result in beautiful, deep blue skies and nicely illuminated close-foreground subjects.
Use a Polarizing Filter
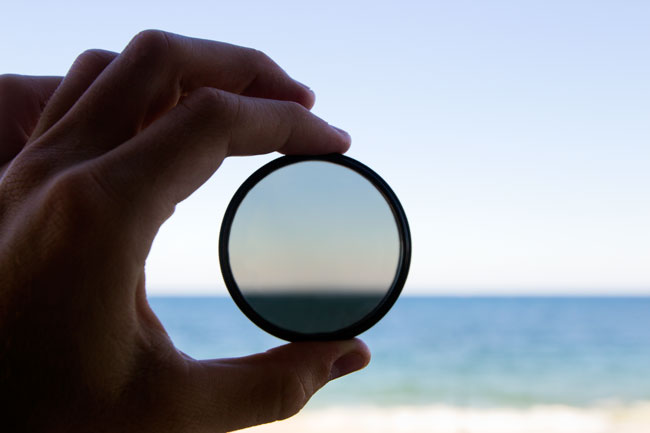
A circular polarizer is a great filter to add to your gear bag and if you have a pair of polarized sunglasses, you’ve already seen the effects this filter will offer. For photographers, a circular polarizer increases contrast between the sky and the clouds and cuts glare on water and glass as well as increasing the overall color saturation of your photo. A circular polarizer won’t help much on an overcast day when you can’t see any blue sky to begin with, but it can really improve a scene on bright days when shooting at certain angles. Because each of your lenses will likely have a different filter thread size, buying a circular polarizer filter is not a one size fits all deal; you’ll need to check which size you need for your lens.
- Warranty

Use a Graduated Neutral Density Filter
Traditional neutral density filters are made of dark glass and block a certain amount of incoming light, while graduated neutral density filters have both a clear half and a darker half, allowing you to position the darker half over the brighter portion of your scene.
The dark portion of these graduated filters gently fades into the clear part, allowing you to cover the sky with the darker half. While circular polarizers can be very effective in some lighting situations, Graduated Neutral Density Filters, often called Grad NDs, are one of the best ways to avoid a blown out sky.
Although these filters come in the circular variety, you’ll have the most flexibility with square/rectangular graduated neutral density filters which will allow you position the darker part of the filter where you would like it to be in your scene, rather than directly in the middle of the lens.